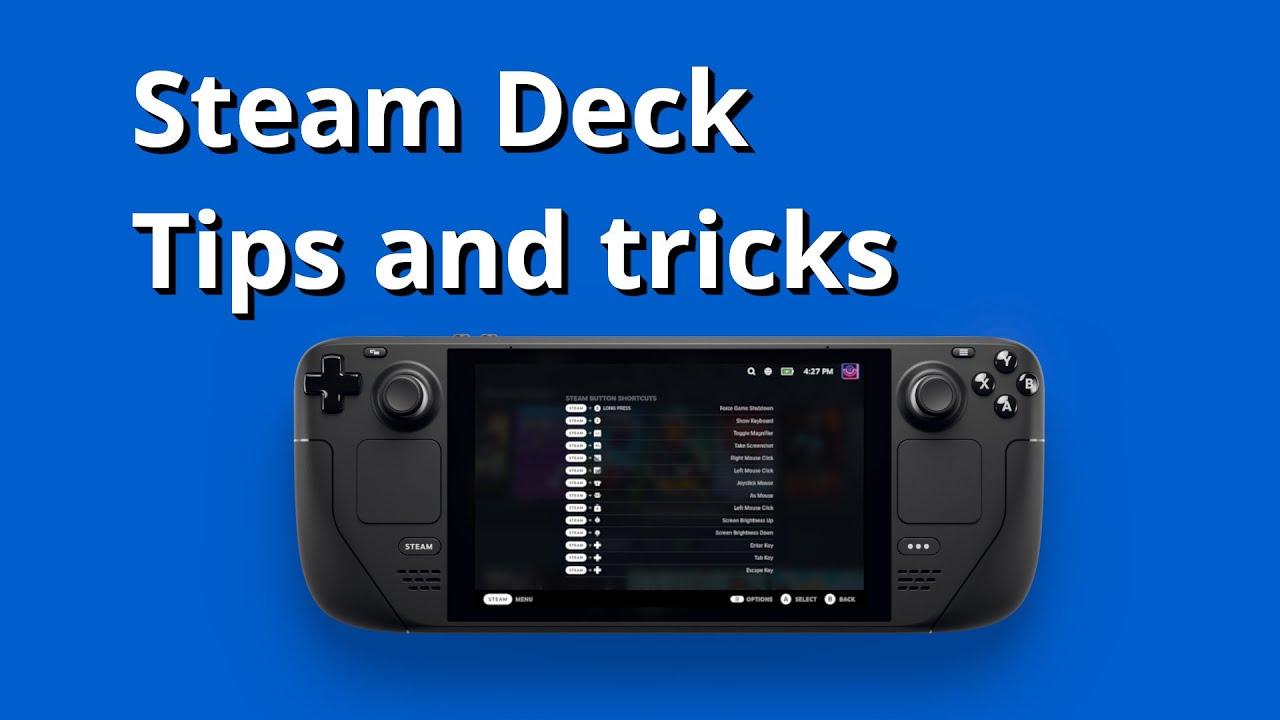
Since Valve are ramping up production and a ton more people than expected will get their Steam Deck this year, plus the expansion into Asia, it was a good time to get some basic quick tips and tricks sorted for you.
I have plenty of guides on here in various articles and on the YouTube channel, although good they're quite spread-out so this is a nice quick reference to jump back to when you need some info. Consider it something of a starter guide for quickly getting up to speed with the Deck.
YouTube videos require cookies, you must accept their cookies to view. View cookie preferences.
Direct Link
Direct Link
Some of what's included:
- You can hold down the Steam or Quick Access button to get a list of shortcuts, these shortcuts work with both buttons, not just the Steam button. An example is Steam+X for opening the keyboard anywhere, and Steam + Right Shoulder button to make a screenshot. You can also hold down the Steam button and then move the right stick to move a mouse cursor any time too. You can even press the Steam and B button together, to force a game to shutdown if you need to. There’s many other shortcuts, so don’t forget to check back on it.
- Plenty of games that aren’t verified work great. You can check ProtonDB for reports on unverified games which is a fully crowdsourced collection, anyone can test a game on Steam Deck or Linux and submit an entry on how it runs.
- Run the screen at 40Hz and 40FPS from the Quick Access menu available by pressing the three dot button on the Steam Deck and going into the Performance menu which has the battery icon. It gives you a simple way to maximise battery life with good performance.
- If you’re going to open up the steam deck, take the sd card out first, or you will snap the card. I died a little inside when I killed a 1TB card doing that.
- Steam Input is your friend, allowing you to fully customize the controls of every single game. You can access it via the controller icon on the games page in your library, or while playing a game by pressing the Steam button, going to the right and selecting Controller Settings at the bottom. Here you can map all the buttons to anything like a mouse, keyboard, turn on gryo, map the back buttons, change deadzones and so much more.
- Use both trackpads for typing with the on-screen keyboard, it’s a lot faster.
- If you find the WiFi not working well, especially on 5Ghz networks, try turning on developer mode and then turning off Wifi Power Management. You’ll see more power usage but it might just fix your issues.
- To access the full desktop mode, you can hold the power button down for a few seconds and select Switch to Desktop or press the Steam button go down to Power and select it there.
- Change the location of where screenshots are saved, so you can access them easier in desktop mode. To do it, in desktop mode go into Steam settings -> in-game menu and change the folder to where you want it to be. You can also select to have higher quality screenshots here too.
- If you’re at home a lot, just buy a long USB-C cable and keep it plugged in with a charger when gaming if you can, it will save your battery life.
- If you’re going to be using a newer Xbox controller over Bluetooth, update the firmware otherwise it won’t connect properly.
- Desktop mode has the Discover software centre, giving you the option to install a ton of extra software like Discord.
- If you have games on GOG or Epic Games, the Heroic Games Launcher available in Discover is your friend. It allows you to login and download games, and then run them through a compatibility layer.
- Adding third-party apps and games to Steam is easy enough too. Open desktop mode, load up the Steam client and go to the big add game button to the left or the Games menu at the top of the client. Then they will also be available in the normal Gaming Mode in the Non-Steam section of the Library.
Some you may have missed, popular articles from the last month:
All posts need to follow our rules. Please hit the Report Flag icon on any post that breaks the rules or contains illegal / harmful content. Readers can also email us for any issues or concerns.
Special mention on the shortcuts for menu button + up/down on the left stick to super quickly adjust the brightness. That's the one that I've used more than any other.
7 Likes
wifi-related thing that might be obvious to us, but trips up a lot of new users that complain about "poor wifi performance":
10MB/s = 80 Mbps
Last edited by andda715 on 5 Aug 2022 at 8:50 pm UTC
10MB/s = 80 Mbps
Last edited by andda715 on 5 Aug 2022 at 8:50 pm UTC
0 Likes
Quoting: andda715wifi-related thing that might be obvious to us, but trips up a lot of new users that complain about the "the poor wifi performance":It's not the performance that's usually complained about but disconnects and just it being flaky as heck in some specific cases.
10MB/s = 80 Mbps
0 Likes
Agreed, it was just an additional item on the list of things that might be confusing to new owners.
Seen plenty comments on reddit etc where complaints are that "Steam Deck only downloads at 50 while I get 400 down on my [switch, pc, tablet]" or variations.
Last edited by andda715 on 5 Aug 2022 at 8:46 pm UTC
Seen plenty comments on reddit etc where complaints are that "Steam Deck only downloads at 50 while I get 400 down on my [switch, pc, tablet]" or variations.
Last edited by andda715 on 5 Aug 2022 at 8:46 pm UTC
1 Likes
When you keep pressing the steam button, it will show you an overlay with the available shortcuts.
2 Likes
One disappointment I found last night was that Neverwinter Nights 2 works perfectly fine on my Debian desktop with nvidia and Heroic Game Launcher with nothing besides selecting the 7-20 GE version.
I tried doing this howto, without much luck.
https://www.reddit.com/r/neverwinternights/comments/w3pbo0/neverwinter_nights_2_on_steam_deck_a_guide/
I tried doing this howto, without much luck.
https://www.reddit.com/r/neverwinternights/comments/w3pbo0/neverwinter_nights_2_on_steam_deck_a_guide/
0 Likes
It's probably a good idea to use a breakaway cable as well :)
2 Likes
I'm surprised SSH isn't mentioned here considering how useful it is to Linux users on any distro :dizzy:
For example once you've got ssh setup to use your ssh keys, you can quickly and easily mount your decks filesystem on your desktop or laptop.
Obvious thing first, add an entry on your desktop/laptop in ~/.ssh/config:
Naturally replace the IP address and your identity files with the ones matching your deck.
Make a mini-bash script and save it as deckmount.sh:
Naturally replace "/home/user/Deck" with your preferred local (desktop/laptop) mount point.
Make it executable:
Done! Simply run the script whenever you want to mount the filesystem:
(You don't need sudo for this, it should mount as your regular user if your mount point is within your /home)
Once ran, you can browse files within /home/deck on your deck right from your filemanager (Dolphin etc) - In the case of dolphin it'll show as a separate device under devices on the left panel. Or you can just directly navigate to the path specified above - usage from this point is exactly the same as if you had plugged in a USB cable, copy/paste etc.
This was a day one, hour one thing for me when I got my deck, since I wanted to transfer files (Namely game files, so I didn't have to download them all over again). :dizzy:
Just my 2c - simple but effective.
PS: Please, for the love of god use SSH keys - not a SSH password they're really easy to setup and give a much higher level of security.
For example once you've got ssh setup to use your ssh keys, you can quickly and easily mount your decks filesystem on your desktop or laptop.
Obvious thing first, add an entry on your desktop/laptop in ~/.ssh/config:
Host steamdeck

    HostName 192.168.1.11

    Port 22

    User deck

    IdentityFile ~/.ssh/id_ed25519_rsk_a_personal

    IdentityFile ~/.ssh/id_ed25519_rsk_b_personal
Naturally replace the IP address and your identity files with the ones matching your deck.
Make a mini-bash script and save it as deckmount.sh:
#!/bin/bash

sshfs steamdeck:/home/deck /home/user/Deck -o reconnect -o cache=yes -o kernel_cache -o compression=no
Naturally replace "/home/user/Deck" with your preferred local (desktop/laptop) mount point.
Make it executable:
$ chmod +x deckmount.shDone! Simply run the script whenever you want to mount the filesystem:
$ ./deckmount.sh(You don't need sudo for this, it should mount as your regular user if your mount point is within your /home)
Once ran, you can browse files within /home/deck on your deck right from your filemanager (Dolphin etc) - In the case of dolphin it'll show as a separate device under devices on the left panel. Or you can just directly navigate to the path specified above - usage from this point is exactly the same as if you had plugged in a USB cable, copy/paste etc.
This was a day one, hour one thing for me when I got my deck, since I wanted to transfer files (Namely game files, so I didn't have to download them all over again). :dizzy:
Just my 2c - simple but effective.
PS: Please, for the love of god use SSH keys - not a SSH password they're really easy to setup and give a much higher level of security.
6 Likes
"I died a little inside when I killed a 1TB card doing that." :heart:
4 Likes




 How to setup OpenMW for modern Morrowind on Linux / SteamOS and Steam Deck
 How to install Hollow Knight: Silksong mods on Linux, SteamOS and Steam Deck