After playing with it for a few weeks, here's what I think along with how to set up the M.2 Docking Station for Steam Deck from JSAUX. Note: JSAUX sent a Dock and a 2TB SSD for review that I can keep.
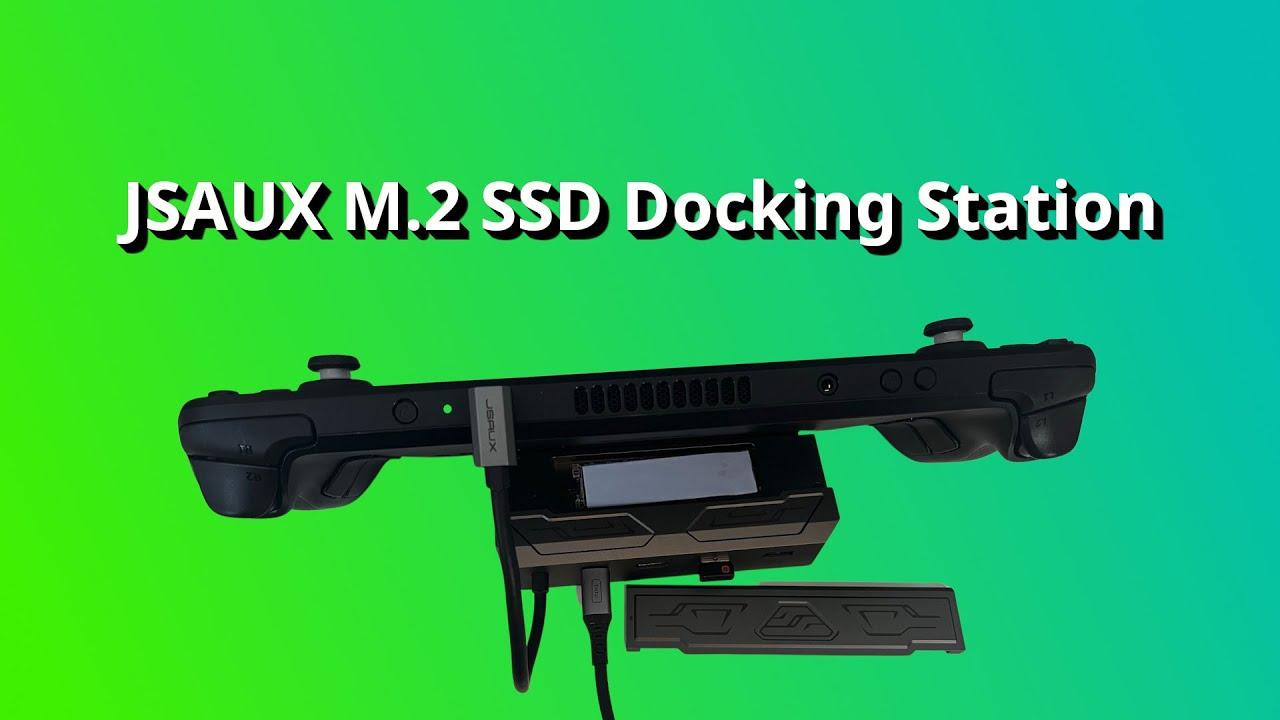
Unlike other Docking Stations (including the official one from Valve), this has a built in M.2 SSD slot so you can give you Steam Deck a whole lot more speedy storage. You can buy the dock by itself but JSAUX also offer it with either a 1TB or 2TB SSD. It features a USB-C slot for charging, HDMI 2.0, two USB-A 3.1 ports and gigabit ethernet on the side.
It's a pretty great looking dock overall, and thanks to the SSD slot being on the back, it keeps it nicely out of the way so you don't really notice it. My continued gripe with JSAUX applies here though, with ethernet on the side being a little annoying because it sticks right out. I do wish the design was a little more like ivoler and Valve with it on the back. A pretty minor gripe though all things considered.
Here's an overview video along with the setup:
Direct Link
It is more on the pricey side at $129.99 without an SSD, $199.99 with a 1TB SSD and $269.99 with a 2TB SSD. However, for the price you're getting something incredibly useful. Really, the pricing depends on if you use it while docked enough to want this, without a different kind of external drive taking up a USB slot and this way it's all nicely integrated.
Thankfully once you've got it set up and ready to go, it works great. All the ports work fine and SSD has been running smoothly inside it with a number of games tested repeatedly on it. The biggest annoyance is the initial setup though, which is down to Valve for only really supporting the Micro SD slot directly.
How to set it up (and any other external drive):
- Set a desktop password with "passwd" in the Konsole terminal app.
- Load the KDE Partition Manager, select the drive and remove any NTFS partition on it.
- Add a new ext4 partition, label it something like "External" and apply the changes.
- You can then use this script to auto mount it and it works great!
The script has a one-liner you can copy and paste into the Konsole terminal app. - Now you need to give yourself permissions on the folder the drive is mounted in. As an example you can run this command in terminal:
sudo chown deck /run/media/deck/*drive name / ID* - On the drive in the File Manager make a "steam" folder. Right click -> Create New -> Folder.
- In Steam go to Settings -> Downloads and add this "steam" folder from the new drive.
- Done.
You can buy it on their website.
More I/O is very high on my wishlist for a Steam Deck 2. To this day I´m still amazed by the amount of ports my little old GPD Win 1 had
Last edited by RavenWings on 14 Oct 2022 at 1:28 pm UTC
Would it be possible to have a full OS (Windows) running on the Dock-M.2, connect two monitors and have it all run somewhat useable for non-gaming-purposes? I doubt this will be possible over the single USB-C on the Deck, but I lack any serious experience on this topic.
More I/O is very high on my wishlist for a Steam Deck 2. To this day I´m still amazed by the amount of ports my little old GPD Win 1 had
considering that you can put windows on the sd card and not have much issue i assume this would too. but id still personally just dual boot on a 1TB nvme internally if i wanted windows
Maybe I'm living in the past, but . . . will Windows even run from an SD card, or anywhere else that isn't a computer's primary hard drive? I remember back in the day it was certainly the case that Linux would boot from a USB but for Windows that wasn't remotely a thing.Would it be possible to have a full OS (Windows) running on the Dock-M.2, connect two monitors and have it all run somewhat useable for non-gaming-purposes? I doubt this will be possible over the single USB-C on the Deck, but I lack any serious experience on this topic.
More I/O is very high on my wishlist for a Steam Deck 2. To this day I´m still amazed by the amount of ports my little old GPD Win 1 had
considering that you can put windows on the sd card and not have much issue i assume this would too. but id still personally just dual boot on a 1TB nvme internally if i wanted windows
yes, its easy to put windows on the sd card. eventually i think steamos will be able to be there too



 How to set, change and reset your SteamOS / Steam Deck desktop sudo password
 How to set up Decky Loader on Steam Deck / SteamOS for easy plugins
See more from me